Walkthrough: no skills required
From a domain name to a live website on your own server
You have never set up a server and you do not want to learn. Good: you do not have to. This walkthrough goes from nothing to a live website with a padlock in the address bar, on a Windows Server you rent, in about an hour, most of which is waiting for the internet to notice your new domain. Every step is a form or a button.
You will need: a domain name, a rented Windows Server, and ServerMaid's Server setup and Websites and SSL modules.
Step 1: register the domain name
Buy the name from any domain registrar. You do not need hosting, a website builder or an SSL certificate from them, however often the checkout suggests it; you only need the name. Turn on auto-renew so it cannot lapse, and privacy protection so your address is not published. Keep the registrar login safe: this is where you will point the domain at your server later.
Step 2: rent a Windows Server
Choose a hosting provider that offers a Windows Server VPS. Pick Windows Server 2022 or 2025, at least 2 GB of memory and 10 GB of free disk; 4 GB is recommended if the database will live on the same server, which for a first site it will. The provider e-mails you the server's public address, the user name (usually Administrator) and a password. Keep that e-mail.
Step 3: buy ServerMaid and open your account
On the pricing page choose Server setup and Websites and SSL. Your account is created at checkout and, within minutes, holds your licence file and the installer. Download both to the computer you are sitting at.
Step 4: connect to the server for the first time
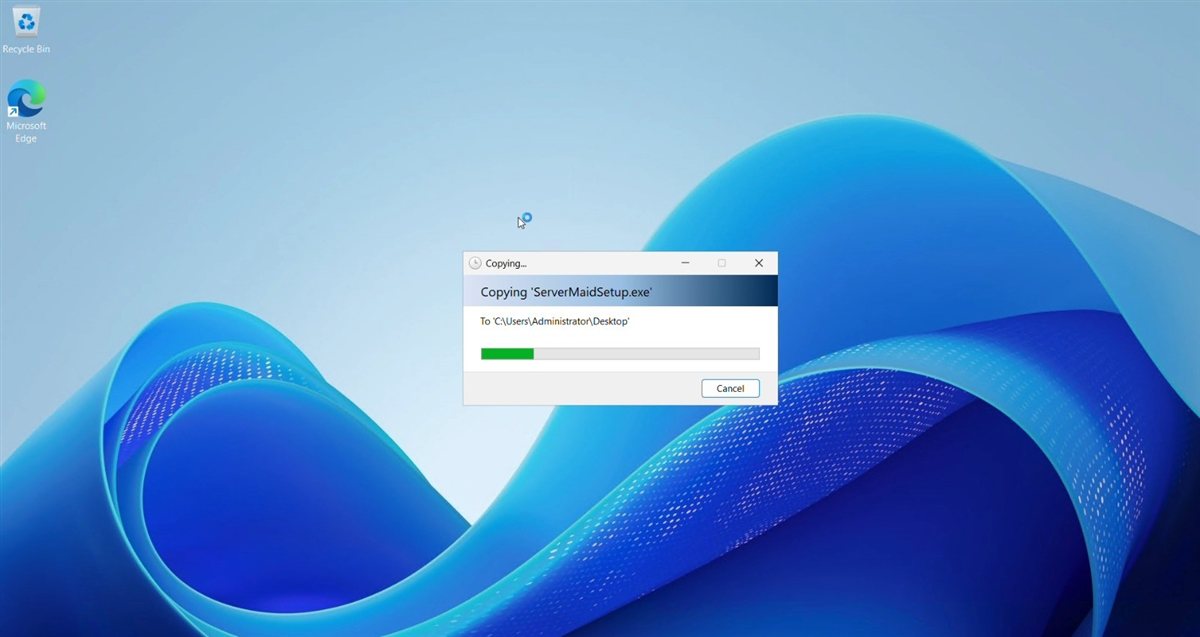
Open Remote Desktop Connection (it is built into Windows; on a Mac, install Windows App from the App Store). Enter the server's address, then the user name and password from the provider's e-mail, and accept the certificate warning, which is normal for a brand-new server. You are now looking at the server's desktop. Copy the ServerMaid installer and your licence file from your computer and paste them onto the server's desktop; copy and paste works across Remote Desktop.
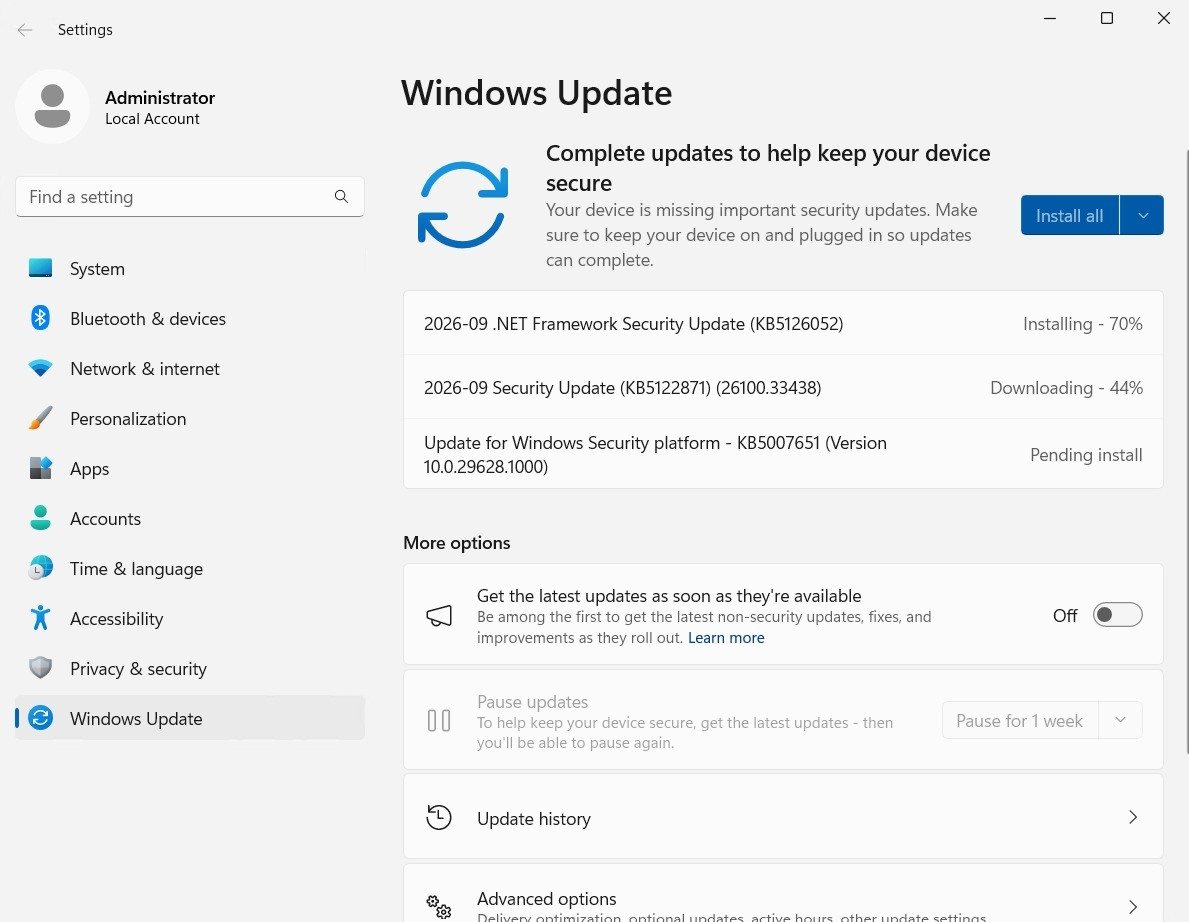
Before anything else, open Settings, then Windows Update, and install everything on offer, restarting when asked and checking again until nothing is left. A brand-new server is usually months behind, and ServerMaid's build can fail in confusing ways on a server that is missing updates or waiting for a restart.
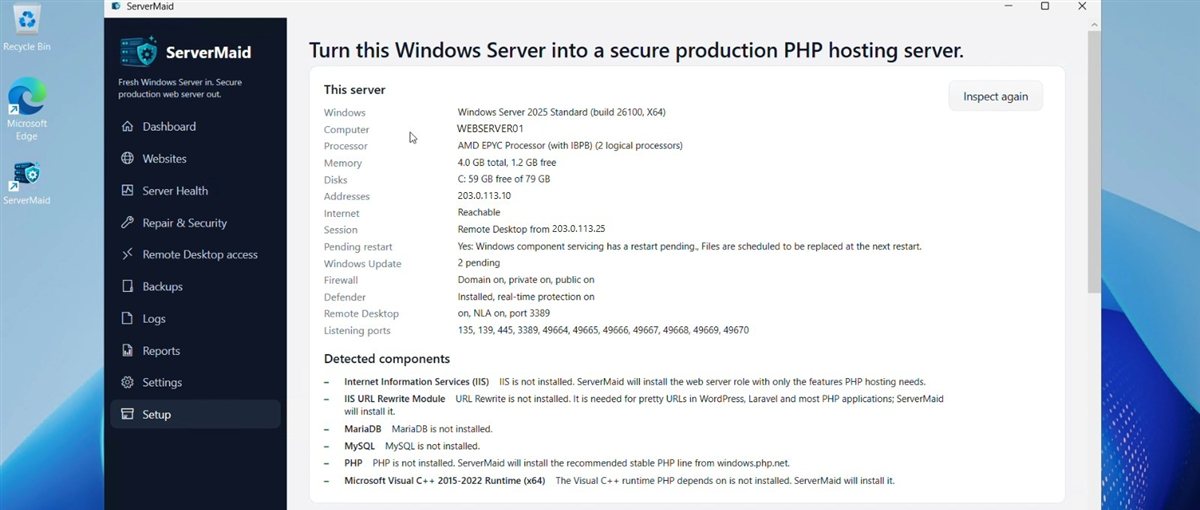
Step 5: run ServerMaid and build the server
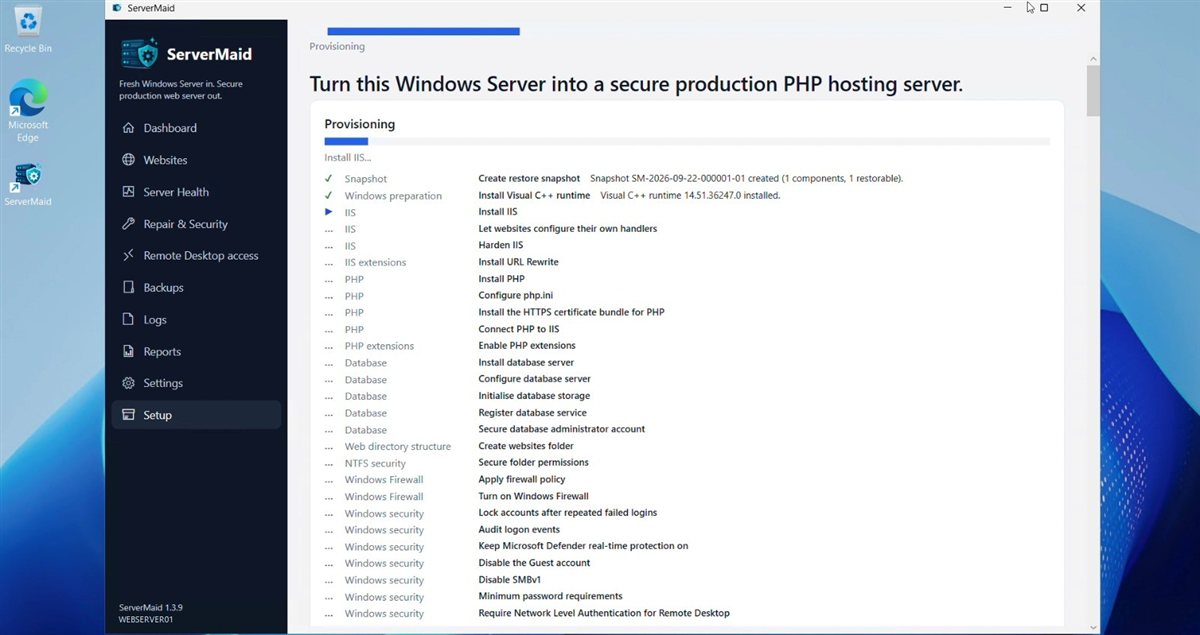
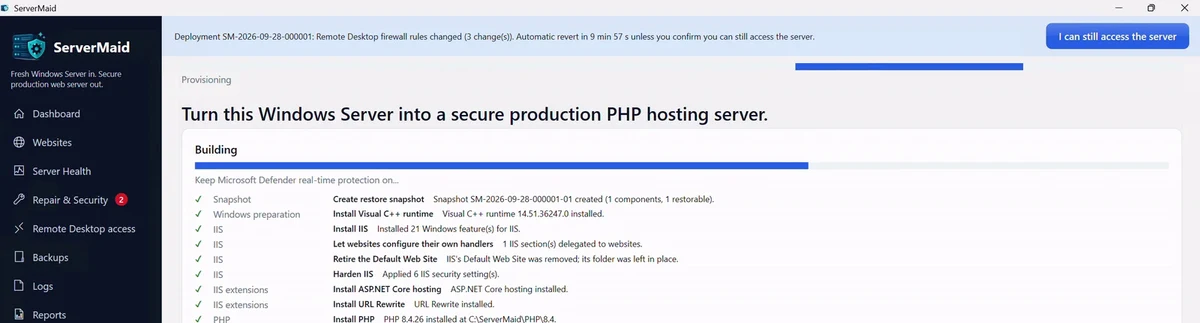
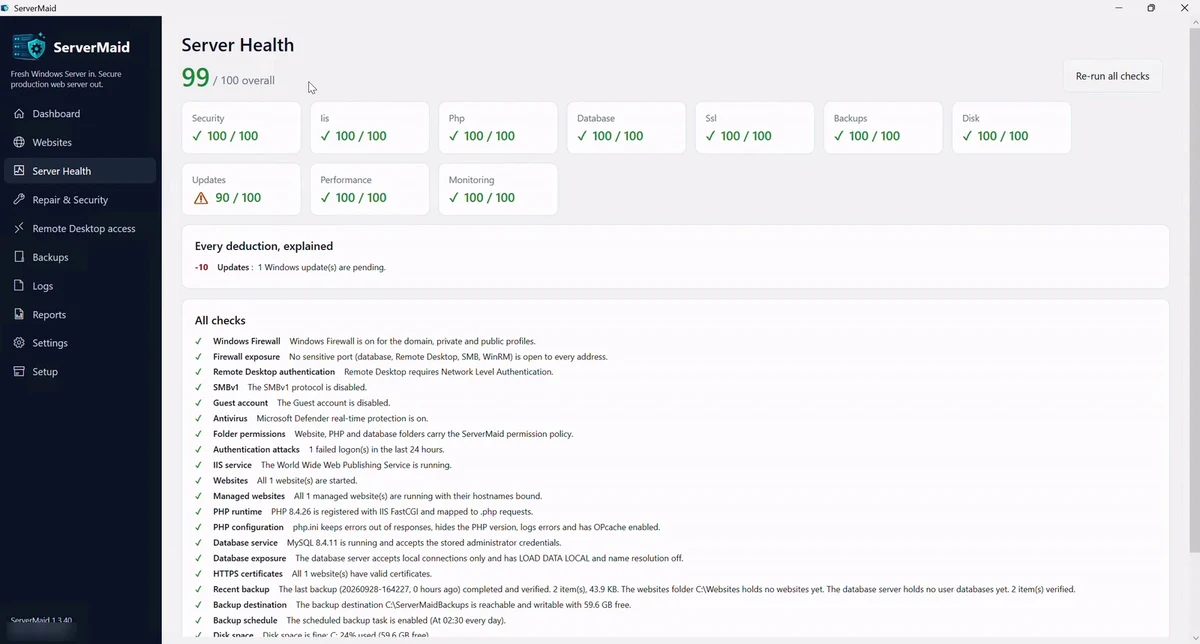
Run the installer, open ServerMaid and choose your licence file when asked. Quick Setup asks two questions: where your websites should live and which database to install; the recommended answers are fine. Press PREVIEW CHANGES if you want to see the whole plan in plain English first, then BUILD MY SERVER. Live progress runs through IIS, PHP, the database, the firewall, the security baseline and backups, and finishes with a health score. It usually takes minutes.
Step 6: add your website
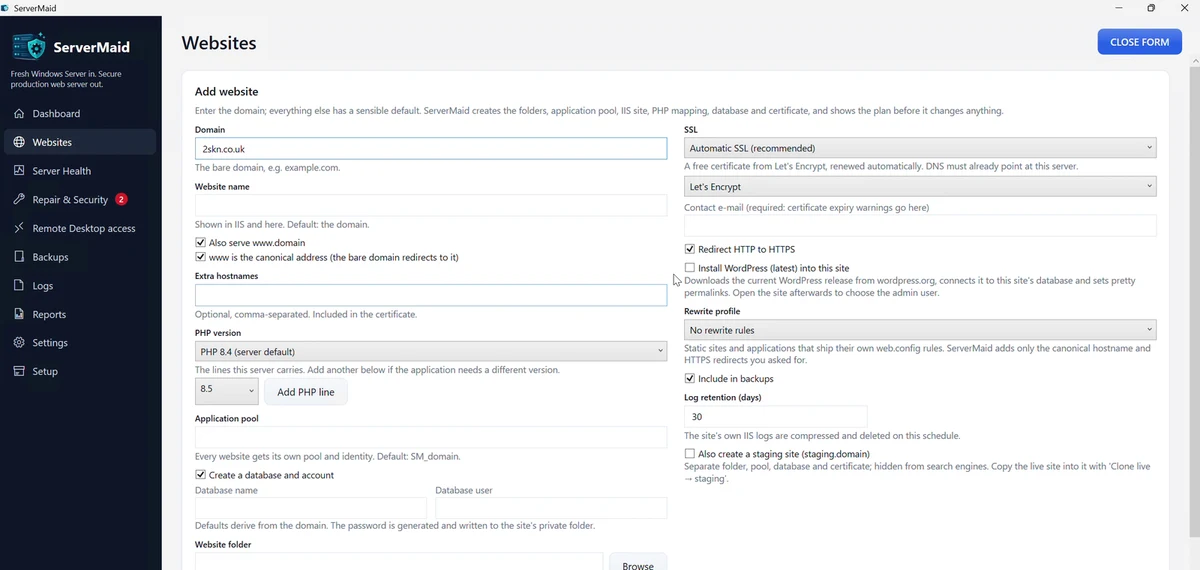
Open the Websites page and press Add website. Enter your domain name and tick the www version too. ServerMaid creates the folders, the application pool, the database and its account, and the pretty-URL rules. It will report that the domain does not point at this server yet. That is expected; the certificate waits for step 7.
Step 7: point the domain at the server
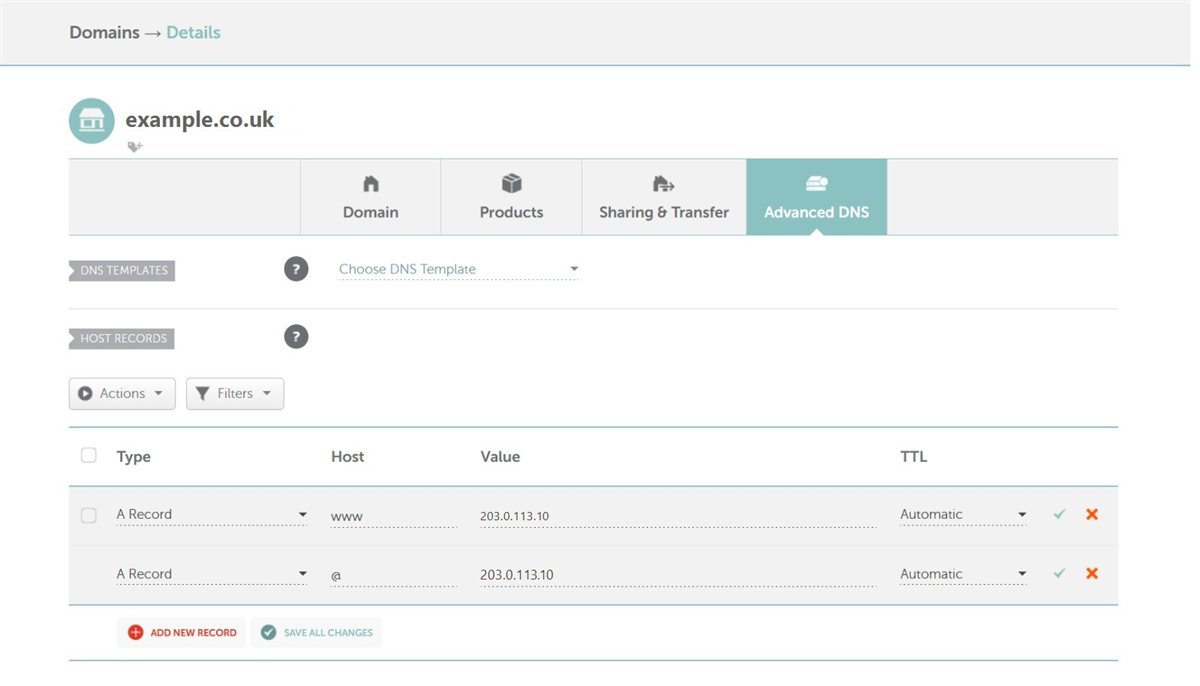
Back at the registrar, open the DNS settings for your domain. Add two A records, each pointing at the server's public address from the provider's e-mail: one for the bare domain (often shown as @) and one for www. Save. The change takes anywhere from a few minutes to a few hours to spread across the internet.
Step 8: press Repair, and the padlock appears
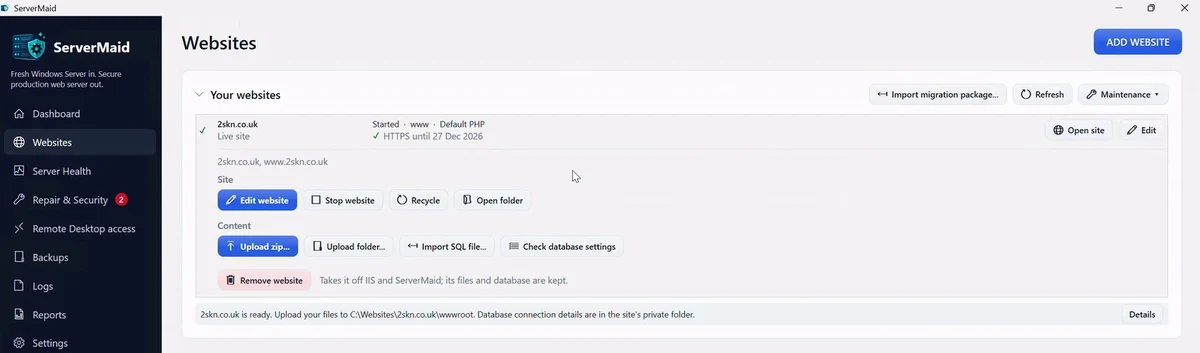
In ServerMaid, press Repair on the Websites page. The DNS check now passes, the free certificate* from Let's Encrypt is issued, HTTPS is bound and the redirect from http to https is added. Open your domain in a browser: padlock, no warnings, and a placeholder page ready for your site.
Step 9: put your website on it
Copy your website's files into the site's wwwroot folder over Remote Desktop, or install WordPress there. If your site needs a database, the credentials are waiting in the site's private folder. WordPress on IIS covers that route in detail.
Afterwards
The health score keeps checking the server and tells you in a sentence if anything needs attention. Add the Backups module for scheduled backups that are proven by a real restore test. If you will connect from somewhere new, add the place on the Remote Desktop access page before you travel.
* Free SSL certificates need the Websites and SSL module (included in Agency and Enterprise licences) on a licence within its twelve-month period. Certificates come from Let's Encrypt; new websites get one while the licence is in date, and certificates already issued keep renewing.
Questions from first-timers
How long does the DNS change take?
Usually under an hour, sometimes a few. You can check by opening the domain in a private browser window: when it reaches the new server instead of the registrar's parking page, press Repair.
Do I need to buy an SSL certificate?
No. ServerMaid gets a free certificate* from Let's Encrypt, trusted by every browser, and renews it automatically. Decline the certificate the registrar or provider offers at checkout.
Can I use a domain I already own?
Yes. Skip step 1 and change the A records in step 7 at whichever registrar holds the domain. If the domain currently serves a site elsewhere, it keeps working until the records change.
What about e-mail at my domain?
Leave it where it is. ServerMaid sets up web hosting, not mail. Change only the A records for the domain and www; do not touch the MX records, and your e-mail carries on.
Do I have to leave Remote Desktop open to the internet?
No. The build limits Remote Desktop to the address you connected from, so the password-guessing bots never reach it. Add other places, such as the office or a phone hotspot, from the Remote Desktop access page.
What does the whole thing cost?
A domain is typically a small yearly fee, a Windows VPS is a monthly fee from the provider, and ServerMaid's Server setup and Websites and SSL modules are a yearly licence per server with unlimited websites. There is no certificate to buy and no specialist to book.
An hour from now, your site is live
Pick the modules, pay for twelve months, and your licence and installer are in your account within minutes. Every build shows you the plan before it changes anything.